Wedding Natural Makeup day is one of the most important days of your life, and it’s only natural to want to look like the best version of yourself! The natural makeup look is a popular choice among brides because it enhances your features in a subtle, timeless way. This guide will walk you through each step to help you create a soft, glowing, and photo-ready look that’s perfect for your big day. With these tips, you’ll have a makeup look that is radiant, romantic, and natural!
Step 1: Prepare Your Skin Wedding Natural Makeup
A flawless makeup look starts with great skin prep. To make sure your makeup lasts all day and looks fresh, spend time preparing your skin properly.

Hydrate: Begin with a good moisturizer suited to your skin type. Hydrated skin will help your foundation go on smoothly and prevent it from looking cakey or settling into fine lines. Look for a lightweight, fast-absorbing moisturizer if you have oily skin or a richer formula if you have dry skin.
Prime: After moisturizing, apply a primer. Primer helps to create a smooth canvas for makeup and ensures it lasts longer. Choose a primer based on your skin’s needs; for instance, a mattifying primer can help control oil, while a hydrating primer adds moisture and a slight glow. Apply a thin layer all over your face, focusing on areas like your T-zone.
Step 2: Apply a Natural Foundation Base
When it comes to foundation for a natural wedding look, the goal is to even out your skin tone without masking it. Go for a foundation with a medium to light coverage that has a natural or dewy finish.

Choosing the Right Shade: Match your foundation to your skin tone and undertone for the most natural effect. A slightly dewy or satin finish foundation will give you that healthy, glowing look without being too matte or heavy.
Application Technique: For a flawless finish, apply foundation with a damp beauty sponge or a brush. Start at the center of your face and blend outward. Using a thin layer will allow your natural skin to show through and keep the look soft and fresh.
Step 3: Conceal and Brighten
For a natural look, apply concealer only where needed, like under your eyes to brighten dark circles, around the nose to cover any redness, or on blemishes.
Targeted Application: Use a concealer that’s one shade lighter than your skin tone to brighten under the eyes. Apply it sparingly in the inner corners of your eyes and blend outwards. This will give you a well-rested, fresh look.
Blend Well: Use a small brush or your fingers to blend the concealer seamlessly into your foundation, creating a smooth, natural transition.
Step 4: Add a Natural Flush with Blush and Bronzer
Adding color and warmth to your cheeks can give you that natural, bridal glow
.
Blush Placement: Choose a soft peach or rosy pink shade that complements your skin tone. Apply it to the apples of your cheeks and blend upwards towards your temples. This placement gives a lifted, youthful look.
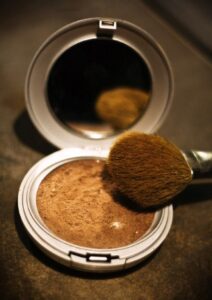
Bronzing for Definition: Lightly dust bronzer along the temples, cheekbones, and jawline. This adds warmth and dimension to your face without harsh contouring. Use a large, fluffy brush for a soft, blended look.
Step 5: Softly Defined Eyes
For a natural bridal eye, stick to earthy tones and soft shimmers. The idea is to subtly define your eyes without dramatic colors or harsh lines.

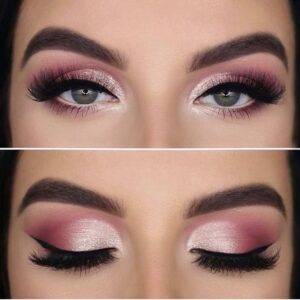
Eyeshadow: Start with a neutral, matte shade in a soft brown or taupe and apply it to your crease. This adds depth without overpowering your eyes. Use a slightly shimmery, champagne shade on your eyelids for a touch of brightness.
Liner and Mascara: Opt for a brown or dark brown eyeliner instead of black for a softer look. Lightly line your upper lash line and smudge it out for a gentle definition. Finish with a couple of coats of mascara to lift and open up your eyes, or consider using brown mascara for an even softer effect.
Step 6: Brows that Frame Your Face Wedding Natural Makeup
Well-defined brows frame your face and enhance your overall look.
Fill Sparsely: Use a brow pencil or powder that matches your natural brow color. Use light, feathered strokes to fill in any sparse areas, focusing on the arch and tail.
Set with Gel: Use a clear or tinted brow gel to hold the shape and keep your brows in place all day. A small amount is enough to give definition without making them look heavy.
Step 7: Soft, Romantic Lips
For a wedding day, a soft nude or pink lip color is ideal for a natural look.
Lip Liner: Start by lightly lining your lips with a shade close to your natural lip color. This gives definition and helps lipstick last longer.
Lip Color: Apply a creamy or satin-finish lipstick in a nude or soft pink shade. For a hint of shine, add a touch of gloss in the center of your lips to make them look fuller.
Step 8: Setting Spray for Lasting Power
To ensure your makeup lasts from the ceremony to the dance floor, finish with a setting spray.

Why It’s Important: A setting spray locks in your makeup, keeps it fresh, and often adds a dewy finish. Hold the spray a few inches from your face and mist it evenly.